Events Quickstart
Learning Objectives
In this quickstart, you'll learn to configure an Event and send a "Hello World" message out.
Before you start, make sure...
- You have the access to the Events Workspace.
- You have an API Key. If you need to create one, see our credentials documentation.
Use Case Overview
Design Pattern: [DP-10] Actionable Updates
Use Case Description: Send PO Approvals with all of the necessary details and a link to take action through the portal.
PO #1234 Requires your Approval
- Requested by: John Smith
- Requested on: 10/26/2023 - 10:03 PDT
Line Items
Item 1: LOGITECH 4K PRO WEBCAM
- Vendor: Logitech
- Cost Center: 0001
- Quantity: 32
- Total cost: $3119.68 USD
Click to Approve or Deny in the portal
Step 1: Create your Event
Creating an Event will generate an Event ID that you will use in your Message API Request. The Event ID is used to track Analytics for that specific use case!
First, click Add Event on the Events Workspace homepage and name your Event.

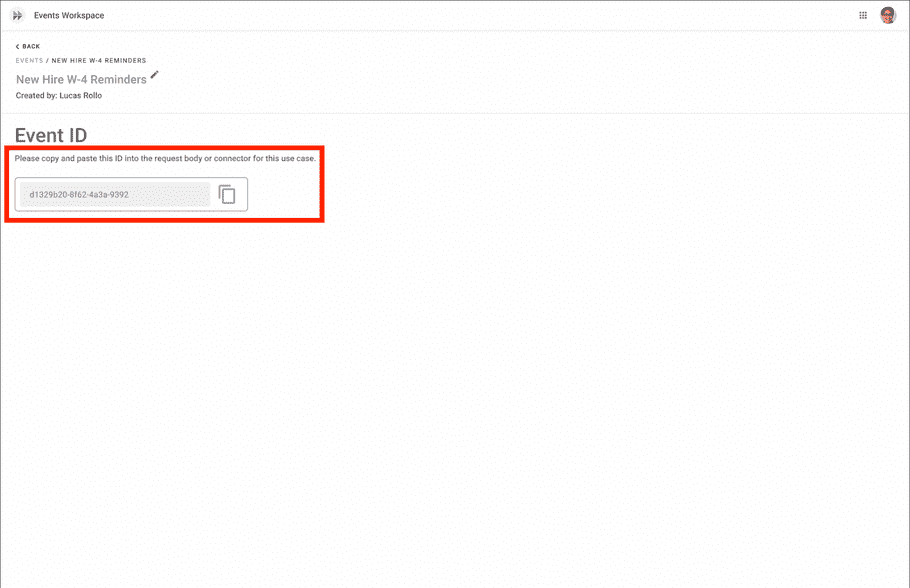
After clicking Create Event, you will be taken to the Event details page where you can copy your Event ID.
You will need to plug your Event ID in the Events API Endpoint in Step 3.

Step 2: Send a Message
Before diving into any workflow tool or code, you should design your message.
Determining what variables you want to bake into the message will help you determine what systems and APIs you need to connect together in order to bring your message to life.
- See Designing for Chat for more tips on how to create an actionable end-user experience.
Note
Don't worry about greeting recipients! Our API automatically includes the recipients names at the top of the card
Draft your message
Export it to the right format for your tool
Or send your message from here
Step 3: Connect an Event-triggered Path
Add Buttons, collect user responses, and trigger actions with Connected Paths
Not sure where to start? Check out our Idea Library for the touch of inspiration you need!
![[object Object]](/static/moveworks-087eddb6bad5559eacc4b35e61bc789e.png)