Event-triggered Paths Quickstart
Learning Objectives
In this quickstart, you'll learn to configure an Event and send a "Hello World" message out.
Before you start, make sure...
- You have the access to the Events Workspace.
- You have an API Key. If you need to create one, follow our guidance on Inbound Authentication.
Use Case Overview
Design Pattern: [DP-26] Event-Triggered Paths
Use Case Description: Send PO Approvals with all of the necessary details and ability to take action straight to Approvers in chat.
PO #1234 Requires your Approval
- Requested by: John Smith
- Requested on: 10/26/2023 - 10:03 PDT
Line Items
Item 1: LOGITECH 4K PRO WEBCAM
- Vendor: Logitech
- Cost Center: 0001
- Quantity: 32
- Total cost: $3119.68 USD
Do you want to Approve or Deny this PO?
Approve
Approve Record (API Documentation)
Got it! Your Approval was submitted
Step 1: Create your Event-triggered Path
Events Basic Info
- Click
CREATEon the Events Workspace homepage

- Copy & Paste the Event Name:
Purple PO Approvals - Click
Yesunder Do you want to add follow-up actions?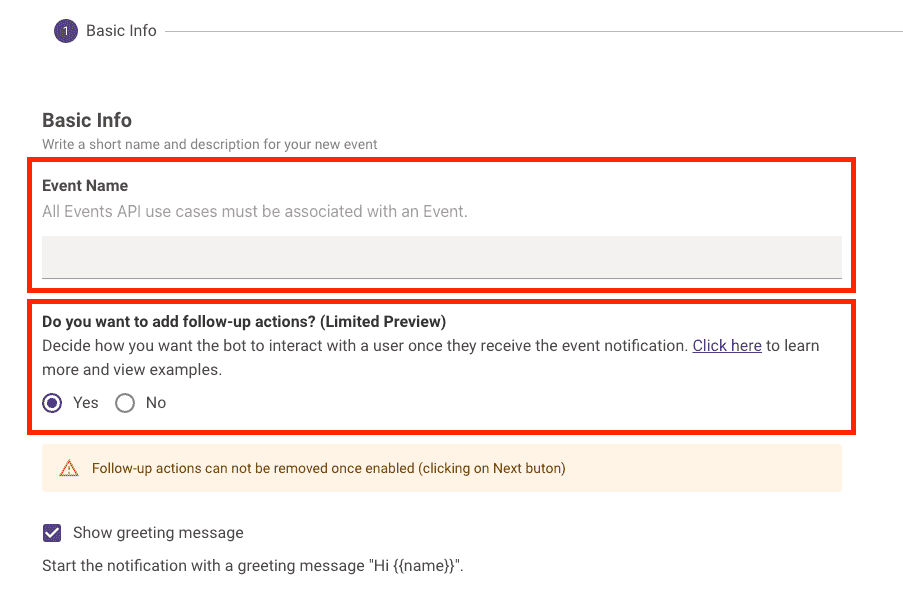
- Click
Nextto go to the next step
Setting up the Path Slot
info
The first slot configured in your Path will be sent along with Event Message.
- Click
Add a bot action - Click
Ask a question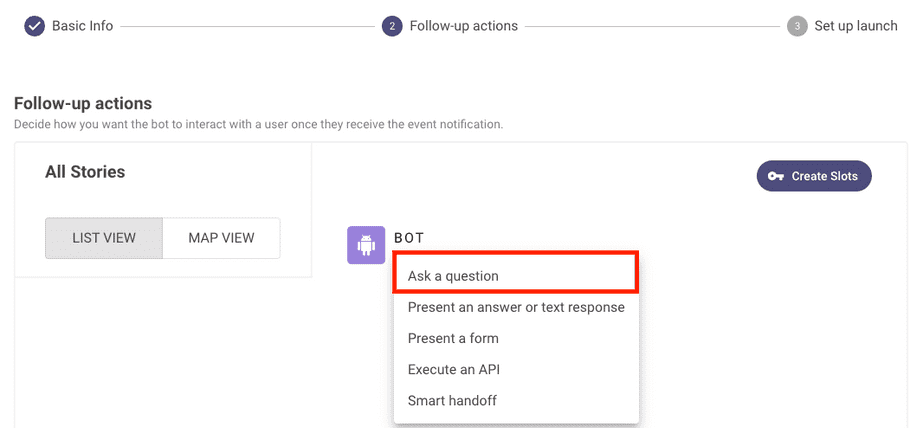
- In Question Detail copy & paste:
Do you want to approve or deny this request?. Make sure you note down the name of the slot that's created.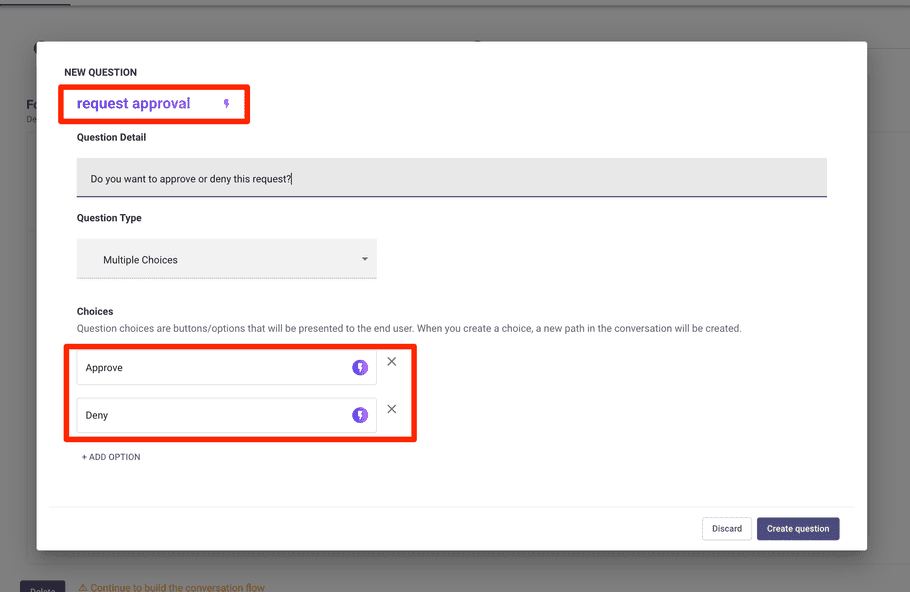
- Click
Create question - Hover over your slot options and click
Merge Options. This allows us to set up a single API call for both Approve & Deny options.
Setting up the Approval API
- Click
Add a bot action - Click
Execute an API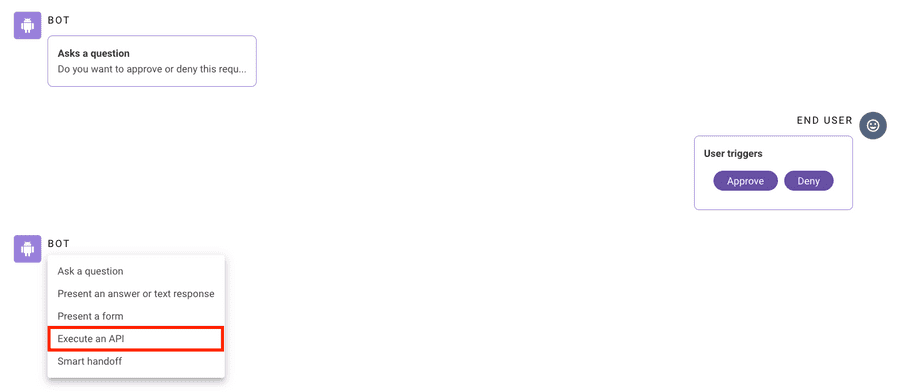
- Select your previously set up
Creator Studio Demo Functionconnector - Click
Next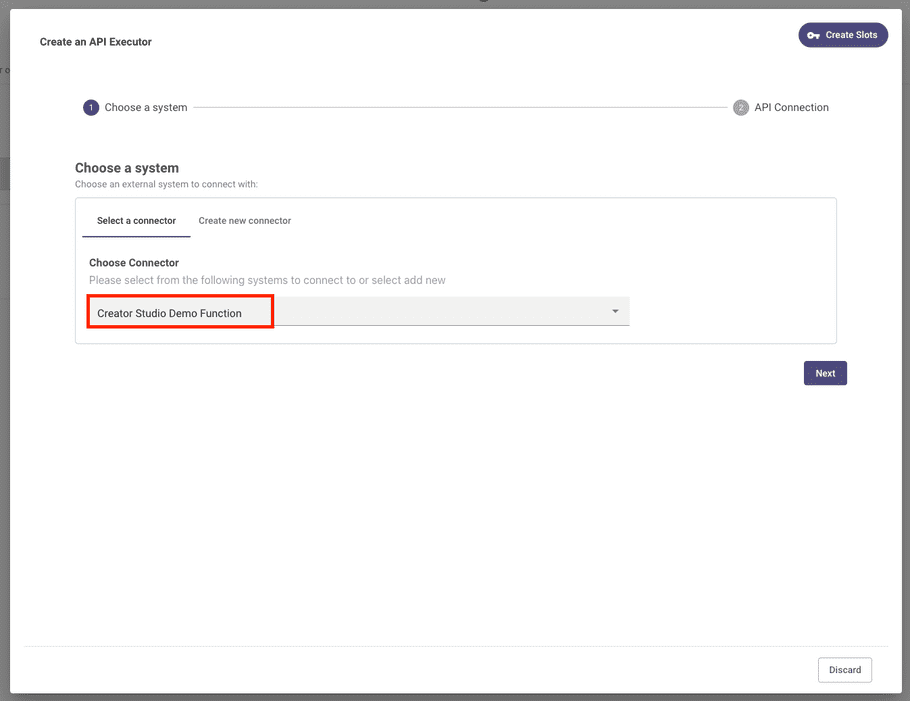
- Click
Create Slotsin the top right of the API editor. This is how we will define variables that can be passed from an Event message to a Path API action. See Event Context Passing for more info - Click
+ ADD SLOT - Name your slot
approval_id - Click
Save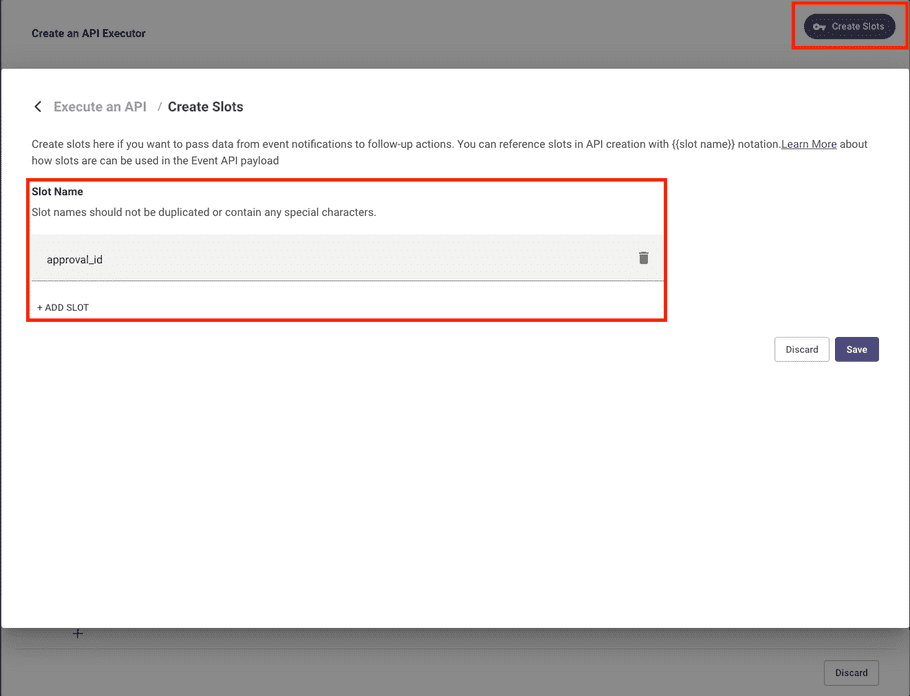
- In API Endpoint Path, insert
/submitApproval - In Method, insert
POST - In Headers, insert
Content-Typeas the Key andapplication/jsonas the Value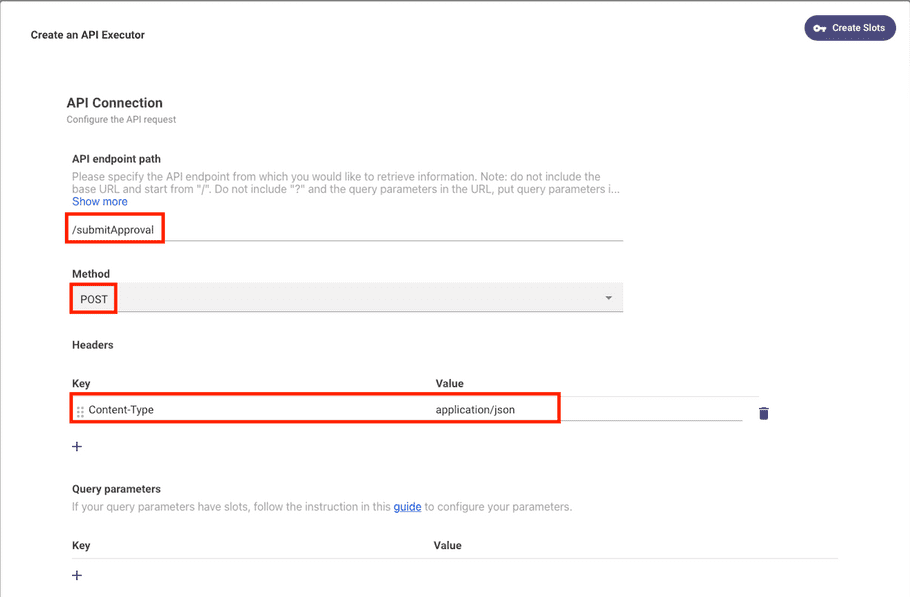
- In the Request Body, copy & paste:
{
  "id": "{{approval_id}}",
  "email": "{{user_email_addr}}",
  "action": "{{request approval}}"
}approval_idwas defined in step 7. We will pass the Approval ID to the API call through our Event Message.user_email_addris the current user's email. You can read about system values like user attributes in the API Configuration page.request approvalis the title of the Paths slot we created in Setting up the Path Slot
- In Action Description, copy & paste
This action takes action on a PO Approval
- Click
Submit - Click
Nextto go to the next step
Launch Options & Publishing
- In Choose a launch option, select
Launch to selected emails - Add your email under Allow Emails Values
- Click
Publish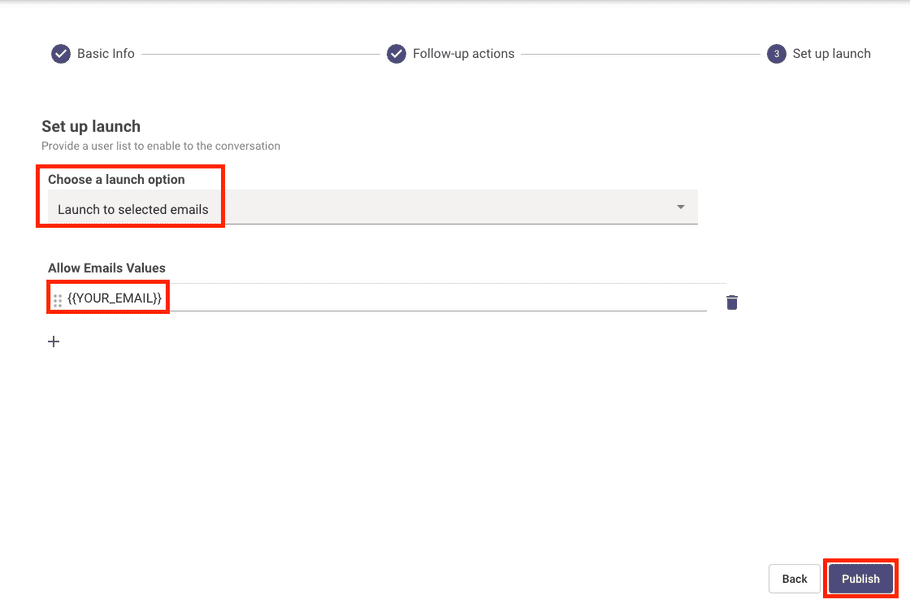
Learn more about the other Launch Management Options.
Step 2: Send your Event Message
Loading...
Message Tester Instructions
- In the Security tab, copy and paste your Events API token. If you don't have one, see this our Key Management Guide to create one
- In the Body tab, copy and paste the below code block.
{
  "message": "Paste your message here",
  "recipients": [
    "<YOUR_EMAIL>"
  ],
  "context": {
    "slots": {
      "approval_id": "<YOUR_APPROVAL_ID>"
    }
  }
}- Remember to replace
<YOUR_EMAIL>with your work email and<YOUR_APPROVAL_ID>with an Approval ID generated from our PurpleApproval Tool
- In the Parameters tab, copy and paste your
Event ID. You can find this on the Basic Info page for your Event after publishing it.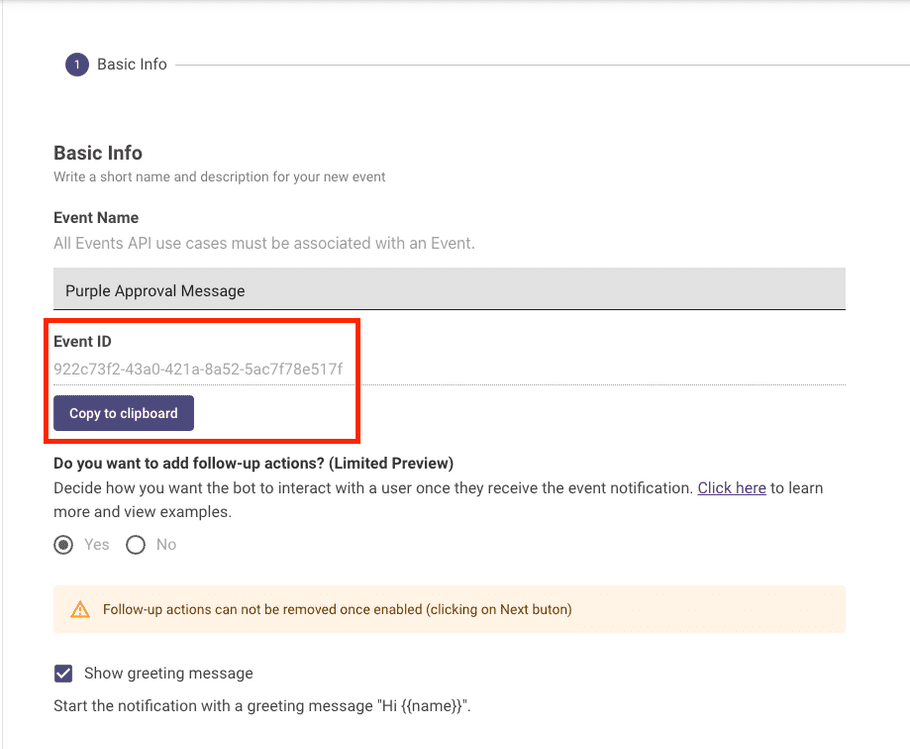
Additional Resources
- Not sure where to start? Check out our Idea Library for the touch of inspiration you need!
- See our Reference Guide for Event-triggered Paths
![[object Object]](/static/moveworks-087eddb6bad5559eacc4b35e61bc789e.png)
![[object Object]](/static/gwen_eriksson-bfea083e90a5e7ac193d5d0aa769a7ca.png)