Azure SSO Configuration Guide
Before you start
- Ensure you have Access to the Azure Admin Portal with the appropriate IAM permissions in Azure to register a new Enterprise Application.
- Identify your Moveworks base url:
- Commercial Environment:
https://my.moveworks.com - GovCloud Environment:
https://my.moveworksgov.com - EU:
https://my.am-eu-central.moveworks.com - Canada:
https://my.am-ca-central.moveworks.com
Azure App Setup Instructions
Go to the https://portal.azure.com/ where you can create new Applications.
Click on App registrations
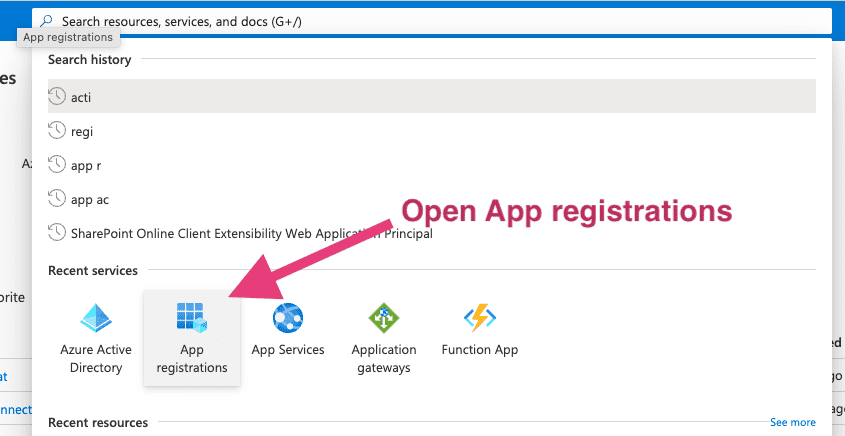
Select New Registration in the next screen.

Configure the application
- Specify a name for the application. We recommend using
Moveworks. - Configure the application.
- Choose
Accounts in this organizational directory only - Select
Web - Use
<moveworks_base_url>/login/sso/oidcas the Sign-in redirect URL.
- Choose
Setup Customer ID
Make sure to get your Customer ID from your Customer Success Engineer before this step
<moveworks_base_url>/login/org/CUSTOMER_ID

Generate idp_secret
- Go to Certificates & secrets on the left
- Click New client secret
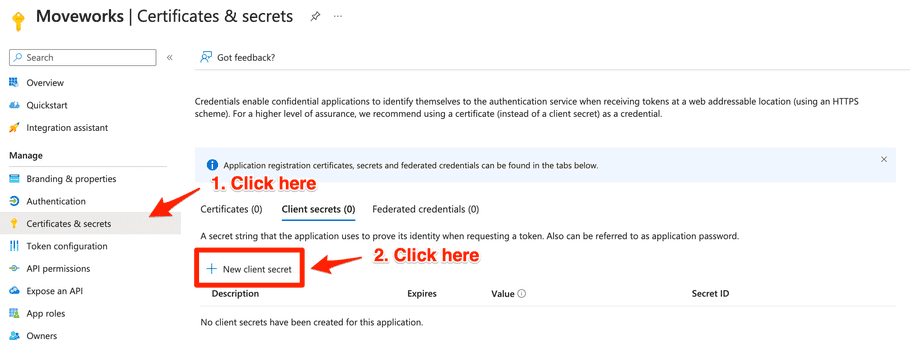
- Add Description and Expires. 24 months is our recommended option to go with as it is the longest time possible. You can have multiple secrets at once, so before one expires you can create another for a seamless cutover.

Once the secret is created, copy the value and send it to your Moveworks CSE. Note that this value is only accessible at the time of creation. You will need to create a new one if the previous one isn’t saved before leaving the page.

Grant tenant level user consent to the app
- Go to Azure Active Directory
- Go to Enterprise Application under Manage
- Find the application just created and open
- Go to Permissions and click Grant admin consent for Moveworks, Inc.

(Optional) Assign the app to employees in the Azure MyApps portal
- Navigate to the Creator Studio Prod Enterprise Application
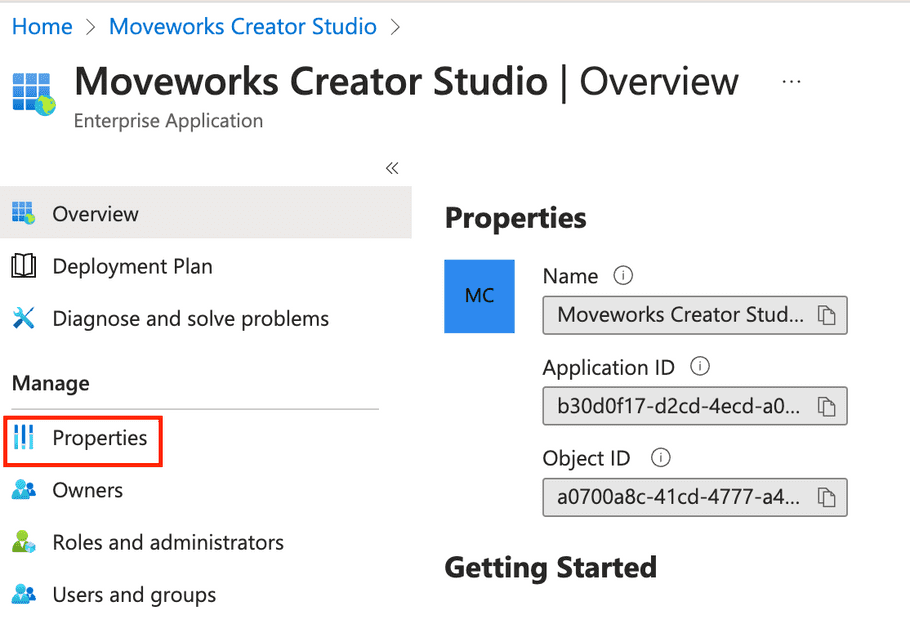
- From the Overview page, click on the Creator Studio Managed Application as shown below

- From there, click Properties as shown below
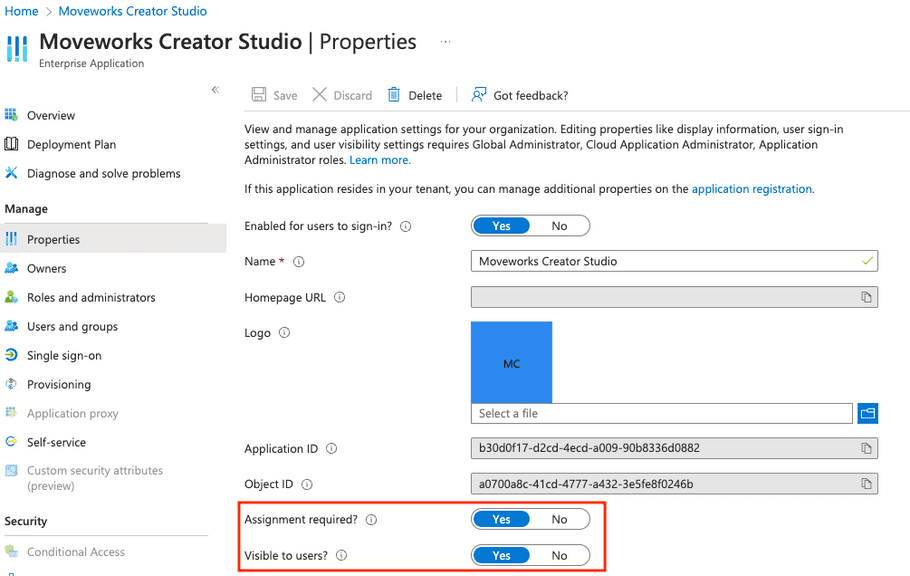
- From the Properties page, toggle the Assignment required field to Yes, and Visible to users field to Yes as shown below
- Navigate to the Users and groups section and assign the app to all users that need access to it either directly or via a group.

- When your users navigate to the MyApps Portal after a few minutes, they should be able to see the app and login directly from there.

Finish Moveworks' side of the integration
After the above setup is complete, provide the following information to your Moveworks Customer Success team.
- Go the Overview in App registrations → your app just created.
- Share the
idp_client_id,idp_secret, andidp_issuerwith your Customer Success Engineer.- idp_client_id

- idp_issuer

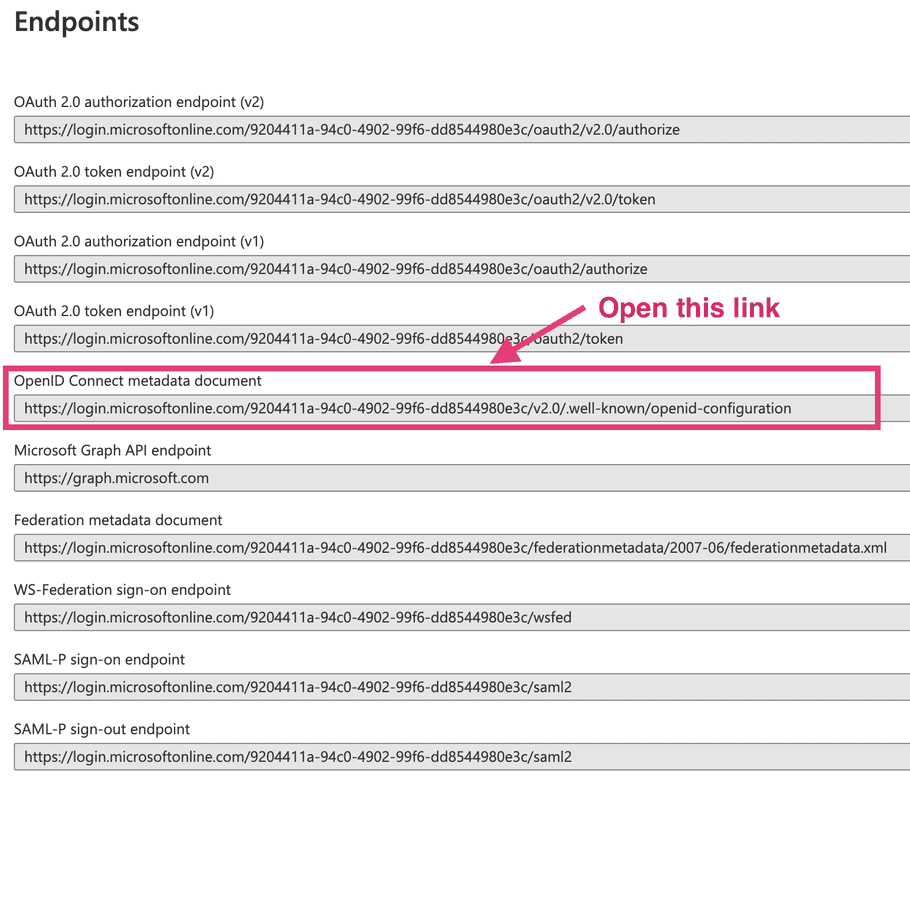

- idp_secret (saved locally in the previous step)
- idp_client_id
Configuring for Custom Domains
Limited Preview Availability
This capability is in limited preview. Please contact your CSM if interested.
If you are migrating to "mycompany.moveworks.com" for your login, please make the following changes to your configuration. This should be done live on a call with the Moveworks team to ensure success.
- Update the
Sign-in redirect URL. It should allow multiple redirect URLs. Please take theCUSTOMER_IDyou used before and add the following URL to the list:
https://CUSTOMER_ID.moveworks.com/login/sso/oidc- Ask the Moveworks Team to finish the update. We'll need to configure our IDP Redirect URL. After that, you can start using your new domain.
- Update the
Home Page URL. It should now be:
https://CUSTOMER_ID.moveworks.com