End-User Access Control
When building Creator Studio use cases, consider these three access control strategies:
Strategy 1: Access Control In Moveworks (aka. Launch Rules)
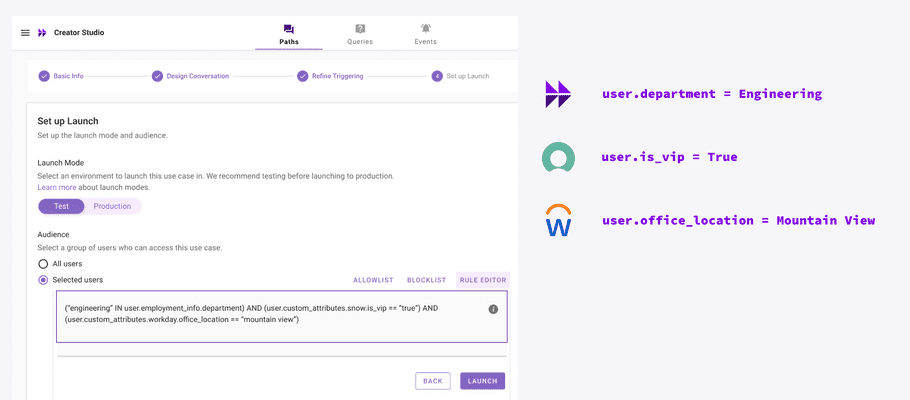
After publishing a use case, you can tailor its availability to specific audiences using "rules". This is especially useful when users lack licenses, allowing you to define a default access control policy.

Note: UI Refresh coming 2024
You can read more about how to write these rules here.
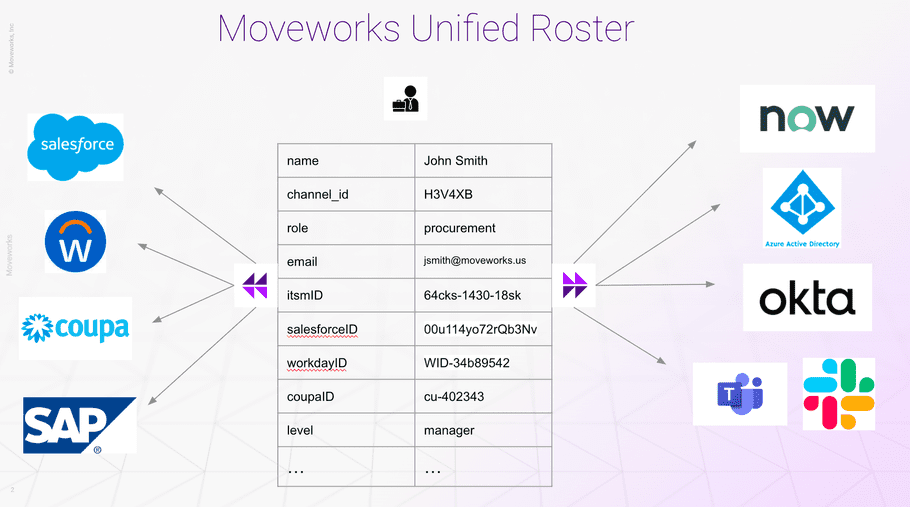
The power of this approach lies in its flexibility: you can pull user attributes from any system to craft these rules.

Moveworks boasts a plethora of native identity integrations. If the identity system you need isn't supported, you can create it using our identity gateway. Learn how to build an identity gateway here.
Strategy 2: Access Control by Design
A common scenario is ensuring users only see their records. In this design approach, you rely on data attributes on the record to determine if the user should have access to it.
| Record Type | Example System | User |
|---|---|---|
| Ticket | ITSM (e.g. ServiceNow) | “Caller” / “Watcher” |
| Account | CRM (e.g. Salesforce) | “Owner” |
| Job Application | ATS (e.g. Greenhouse) | “Hiring Manager” |
| PTO Balance | HCM (e.g. Workday) | “Employee” |
In this scenario, you
- Pass the user's information into your API You can provide user email addresses today (docs).
- Query the record of interest that the user wants to see or modify. You may filter records by the user’s account.
- Check the data attributes of that record (Find the watcher/caller/hiring manager)
- Fail the request if the user shouldn’t have privileges
Note, this requires you to “mirror” the access control logic of your downstream system in your process/experience APIs.
Strategy 3: Access Control by System Authentication
This strategy uses the access control policies defined by your external system to enforce access control. There are three tiers of system-based authentication integrations.
Tier 1: Using JWT User Claims
In this integration tier, the user's email address passed in the authentication details. The downstream system then interprets actions as if executed by that user, ensuring the right access controls are applied.
Learn more about JWT User Claims.
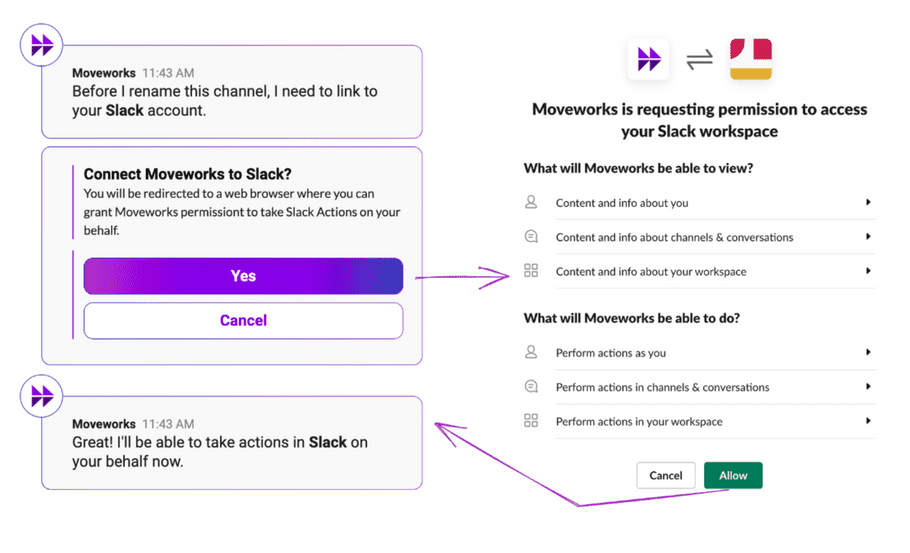
Tier 2: Using OAuth 2.0 Web Server (with User Consent) Flows
This is similar to Tier 1 (JWT User Claims), but involves a user step to grant permission before the bot can take action.

Please contact our product team if your system supports OAuth 2.0 Web Server flow.
Tier 3: Using RPA Tools
When the proper integration APIs are not available with your tools, RPA provides a powerful fallback. Since RPA logs into applications on behalf of users the keystrokes & button clicks they execute follow that user’s permissions.